Auto Provisioning
Overview
Auto Provisioning lets a handset collect its own configuration instead of being set up by hand. When the phone starts, it asks the myCloudPBX provisioning server for its settings and receives its SIP account details, firmware and features. The phone is registered and working within minutes, with no per handset typing and no transcription errors.
Setting a handset up for Auto Provisioning is two steps.
- Tell the Portal which handset belongs to which user, by recording its MAC address against that user.
- Point the handset at the provisioning server. How this happens depends on the brand. Yealink handsets do it by themselves. Other brands need the provisioning server address delivered on your local network, usually by DHCP.
The provisioning server address is:
ps.mycloudpbx.com.au
Your public IP must be allowed
The myCloudPBX provisioning server is protected by a firewall. The site's public IP address has to be on the allow list before any handset can provision. See Provisioning firewall rules below.
Supported brands
The Portal can provision handsets from the brands below. For the specific models tested on each, see Compatible Hardware.
| Brand | How the handset finds the provisioning server |
|---|---|
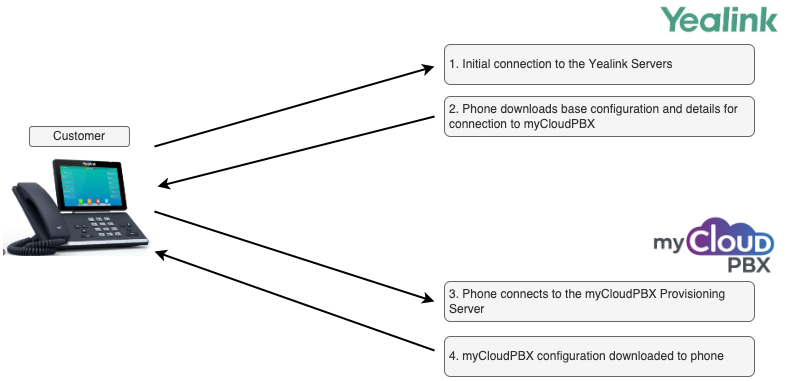
| Yealink | Automatic. Yealink handsets check in with Yealink's own redirection service, which myCloudPBX is integrated with, and are sent to our provisioning server. Nothing to configure on site. |
| Cisco and Linksys (SPA models) | DHCP option 66 on the local network. |
| Polycom | DHCP option 160 on the local network. |
| Fanvil and Grandstream | Supported in the Portal. The handset needs the provisioning server address set, and the method varies by model, so contact support if you are deploying these. |
Yealink is the only true zero touch option
With a Yealink handset you record the MAC address and power the phone on. With every other brand you also have to get ps.mycloudpbx.com.au into the handset, either through DHCP or by typing it into the phone's web interface.
Step 1: Add the handset to the user
- Go to 'Offices and Users' and select the office, then the user the handset belongs to.
-
Click 'Manage User', then open the 'Handsets' tab.
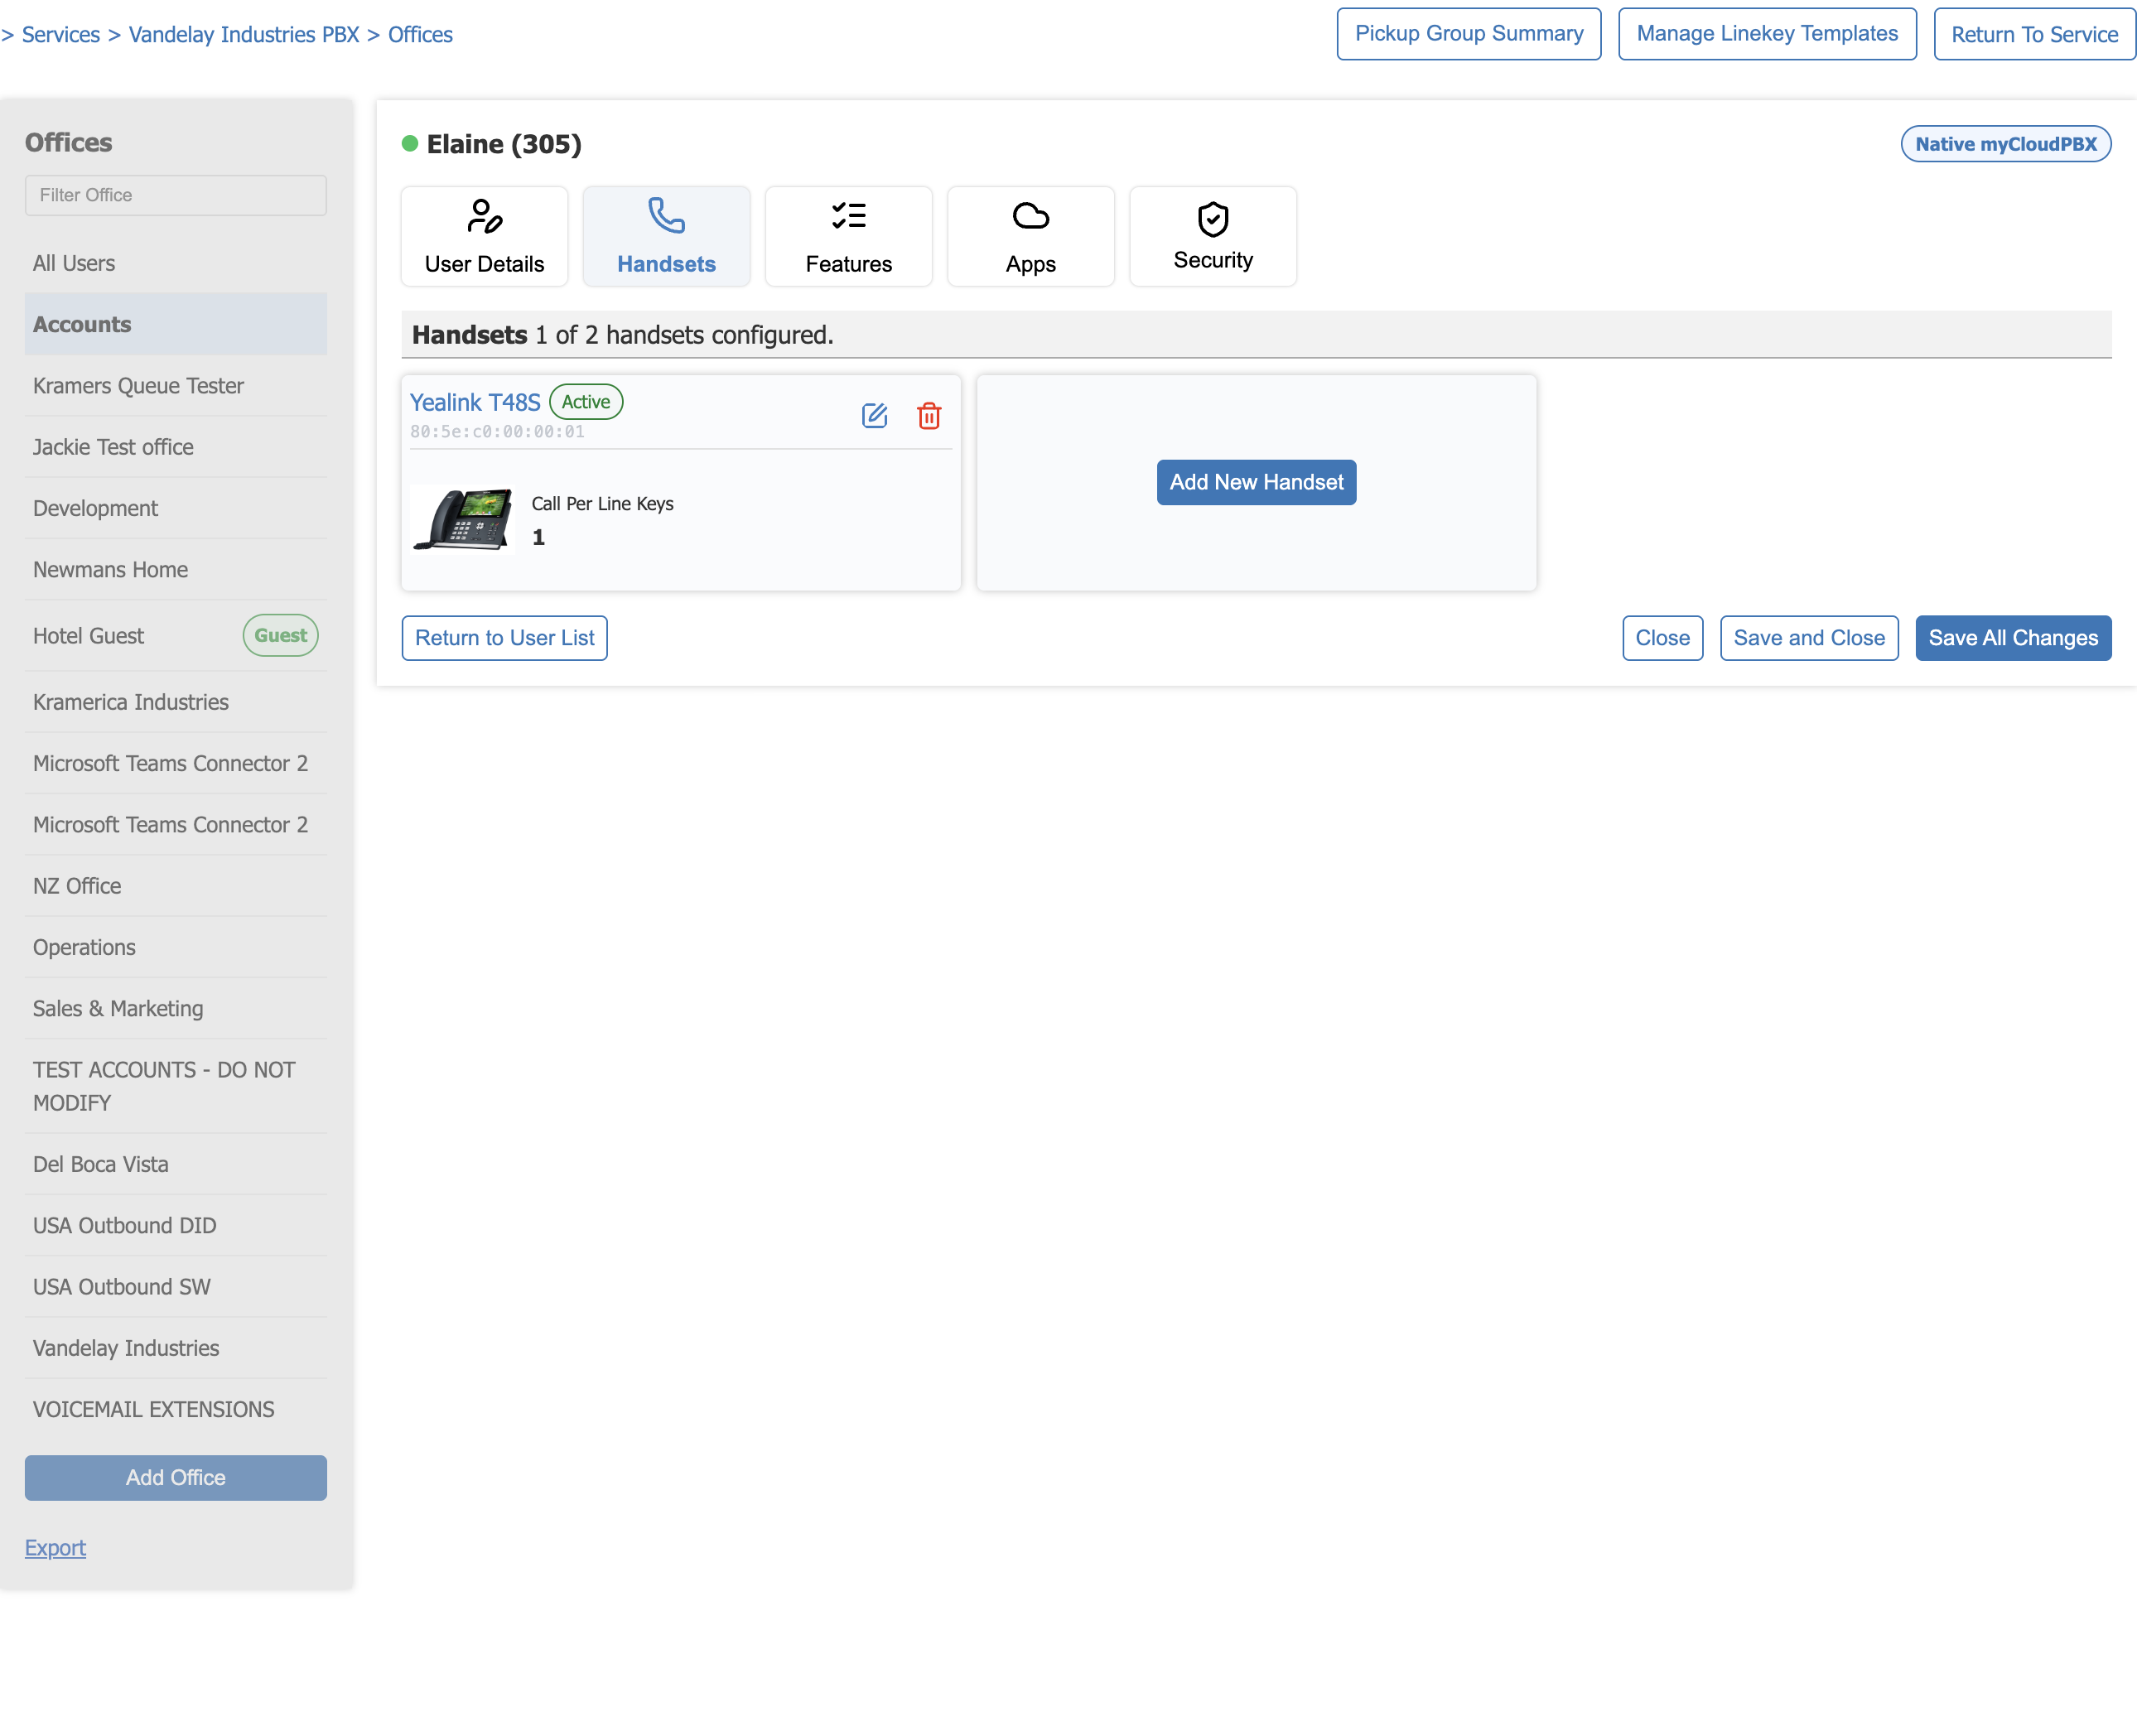
The tab shows the handsets already recorded against this user, each with its model, status and MAC address, and how many of the user's allowed handsets are in use.
-
Click 'Add New Handset'.
Note
Adding a second handset asks you to confirm it is for the same person. A myCloudPBX user is licensed to one individual, and sharing a login across people can attract additional charges.
-
Complete the handset details.
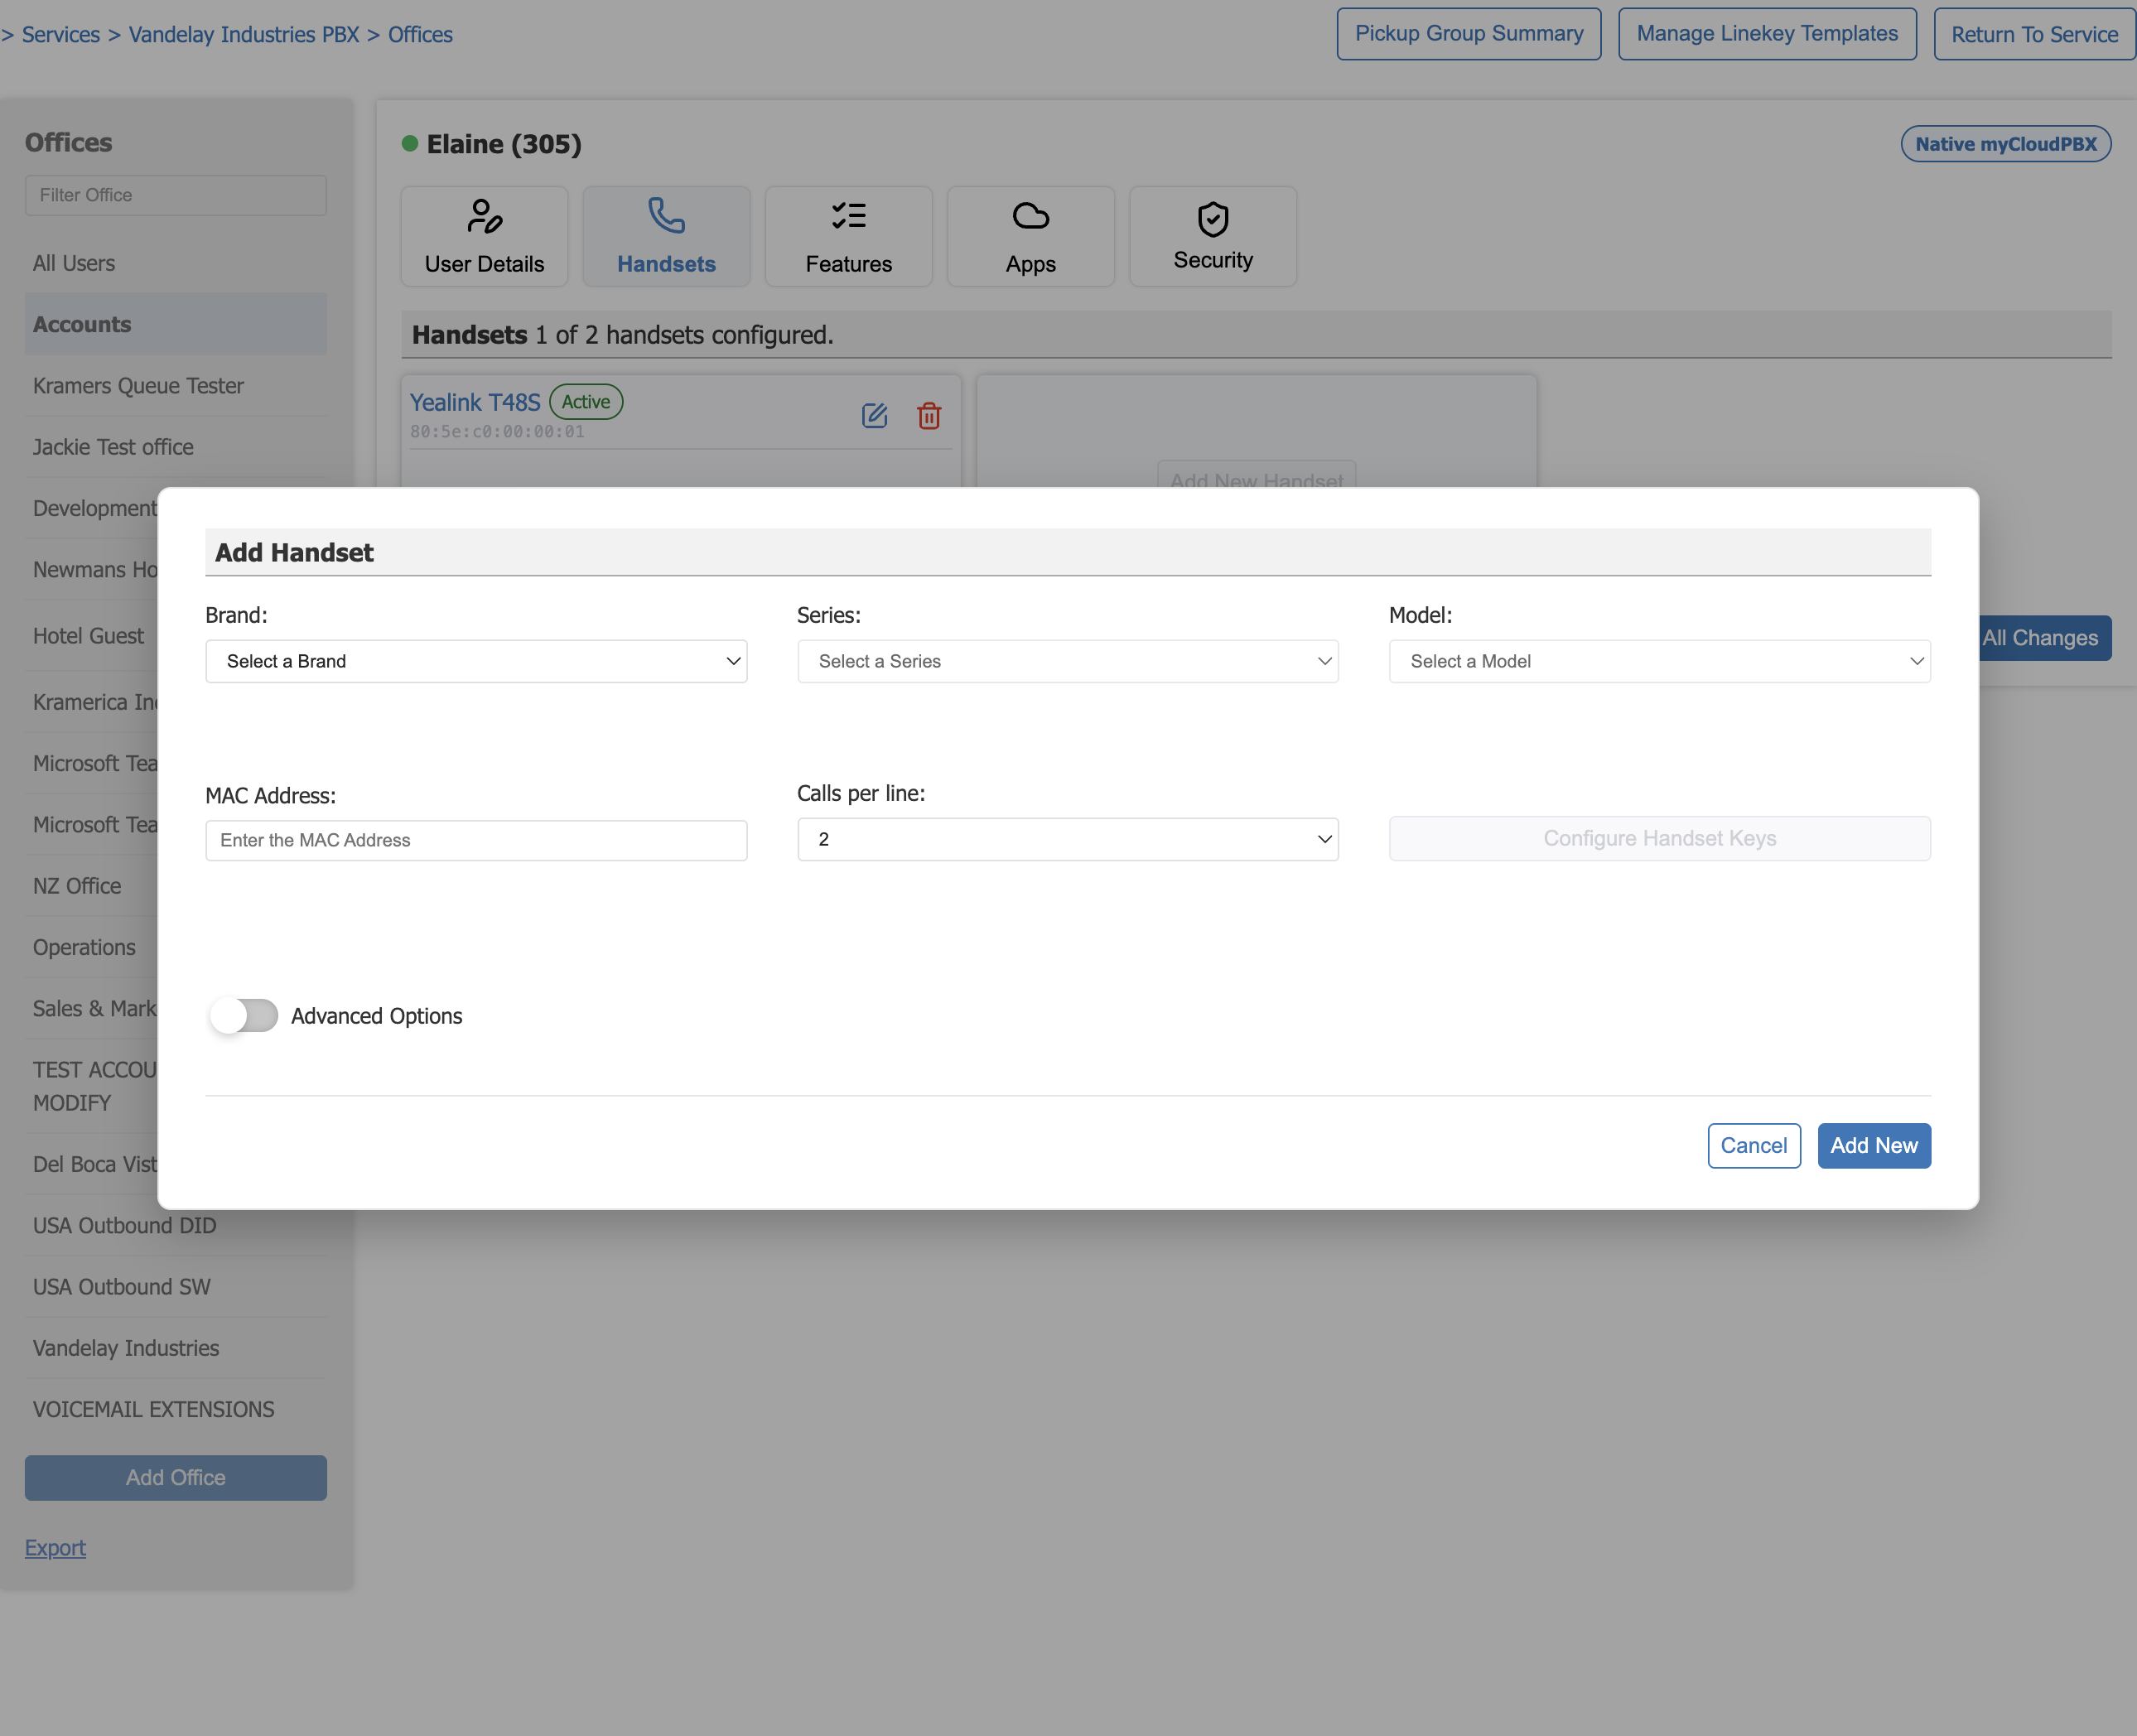
Field What to enter Brand The handset manufacturer. Series The range within that brand, for example T5 Series. Model The exact model. MAC Address The handset's MAC address, printed on a label underneath the phone and also shown in its on screen menu. Calls per line How many simultaneous calls each line key will hold. Configure Handset Keys Available once a model is chosen. Sets what the programmable keys on that handset do. Advanced Options Additional per handset settings. Leave off unless you have been asked to change something here. Keep Calls per line at 2 or fewer
1 turns call waiting off, so a second caller never interrupts. 2 allows one call waiting, which suits most people. Higher values are available but we do not recommend them: more simultaneous calls on one key makes the phone harder to use and callers more likely to be left holding.
-
Click 'Add New', then 'Save All Changes'.
Step 2: Point the handset at the provisioning server
Yealink
Nothing to do. Power cycle the handset and it will find its own way to the provisioning server.
Yealink redirection endpoints
Yealink provisioning depends on reaching Yealink's own servers. If outbound traffic is filtered on site, allow the following:
https://dm.yealink.comhttps://api-dm.yealink.comhttps://rps.yealink.com52.71.103.10235.156.148.166106.15.89.16147.75.58.20247.89.187.0
Cisco and Linksys SPA models
Set DHCP option 66 on the local DHCP server to ps.mycloudpbx.com.au, then power cycle the handset.
Polycom
Set DHCP option 160 on the local DHCP server to ps.mycloudpbx.com.au, then power cycle the handset.
Entering the address by hand
Where DHCP cannot be changed, the provisioning address can be typed into the handset directly. The wording differs between models, but the process is the same.
- Find the handset's IP address from its on screen menu, usually under a network or status heading.
- Enter that IP address in a web browser to open the handset's web interface, and log in as administrator. Cisco SPA models default to
admin/admin, Polycom toadmin/456. - Find the provisioning settings. On Cisco SPA models, switch to Admin Login and Advanced view, then open the Provisioning tab and enter the address in Profile Rule. On Polycom, open Settings > Provisioning Server, choose the server type, and enter the address in Server Address.
- Save, and reboot the handset if prompted.
Change the default password
A handset left on its factory administrator password is reachable by anyone on the same network. Change it once provisioning is working.
Provisioning firewall rules
For a handset to be allowed to provision, the site's WAN IP address must be on the allow list in the Portal.
-
Hover over 'Admin' and select 'Firewall Rules'.

-
Click 'Add Rule' and enter the site's public IP address.
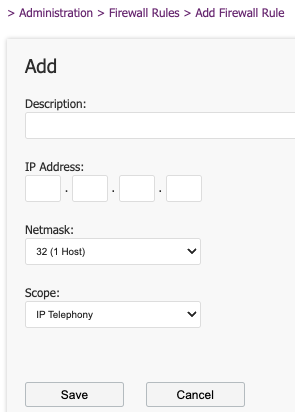
A handset on a network whose IP is not listed will fail to provision, even when everything else is correct. This is the most common cause of a phone that stays unconfigured.
Troubleshooting
The handset never picks up a configuration.
- Confirm the site's public IP address is on the firewall allow list.
- Confirm the MAC address recorded against the user matches the label on the handset exactly.
- Confirm the handset has an IP address and can reach the internet.
A Yealink handset is not redirecting.
- Confirm outbound access to the Yealink endpoints listed above.
- A handset previously provisioned elsewhere may still be pointed at another server. It needs to be reset to factory defaults.
A Cisco, Linksys or Polycom handset is not redirecting.
- Confirm the DHCP option is set, and that the handset is being issued an address by that DHCP server rather than another one.
- Check the option number matches the brand: 66 for Cisco and Linksys, 160 for Polycom.
The handset provisions but will not register.
- Check the user's extension and password in the Portal.
- Check the system logs for provisioning errors.