Overview
These guides will walk you through activating the myCloudPBX Softphone for a user. Once activated, you will be able to use the following guides to install and use the Softphone on your devices.
Activating / Deactivating the myCloudPBX Softphone
From the Extension configuration page, on the right-hand side of your screen, you will see a section labelled 'myCloudPBX' as shown below.
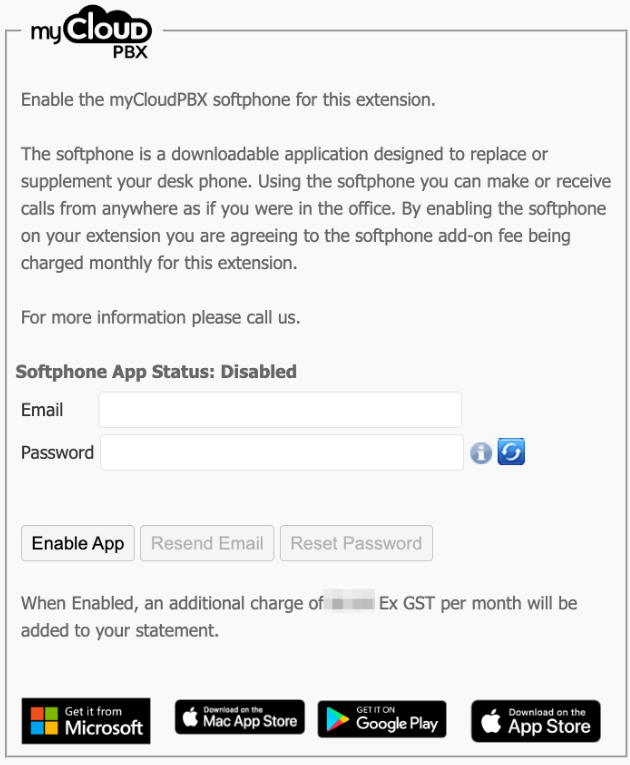
Activating the Softphone
Step 1.
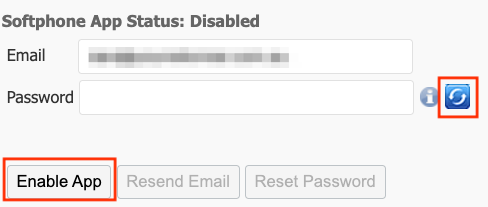
Enter your 'Email Address', and a 'Secure Password'.
Tip
Use the recycle icon to have myCloudPBX generate a Secure Password for you.
Then click 'Enable App' to re-activate the Softphone.
Step 3.
Scroll to the bottom of the page, then click 'Save and Close'
Completed
You will now receive an email containing the download links for the Softphone. (The Softphone supports Mac, iPhone, Windows, & Android). The email will also contain the username you will use to login to the Softphone. The password is never sent via email and is shown to the user only when first activating the Softphone.
You can now sign into the Softphone using the new credentials on up to 4 devices.
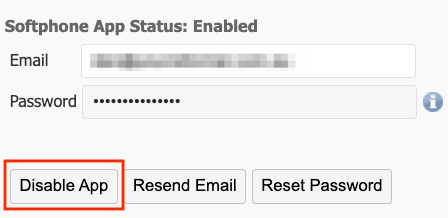
Deactivating the Softphone
Click 'Disable App' to deactivate the Softphone for the user.
Updating Softphone Name
When changing the name of the Extension, the name on the Softphone will be updated automatically.
Troubleshooting
Device Activation Limit Reached
When you enable the myCloudPBX Softphone for a user, they will be granted a license allowing the installation of the Softphone on up to 4 devices.

Each time the user signs into the Softphone on a new device, that counts as a device activation.
If you see the message showing 'Device Activation Limit Reached', you will need to reset this count which will allow up to 4 new devices to be used.
You can reset the device count by disabling the app, and then re-activating it on the extension configuration page for the user.
Step 1.
Click 'Disable App'.
Step 2.
Once the page reloads, enter your 'Email Address', and a 'Secure Password'.
Tip
Use the recycle icon to have myCloudPBX generate a Secure Password for you.
Then click 'Enable App' to re-activate the Softphone.
Step 3.
Scroll to the bottom of the page, then click 'Save and Close'
Completed
You can now sign back into the Softphone using the new credentials on up to 4 devices.
Password Reset / Forgotten Password
Step 1.
Click the 'Reset Password' button.
Step 2.
myCloudPBX will suggest a Secure Password for you, or you can override it and enter a password of your chosing.
Step 3.
Click 'Save Password' when finished.
Completed
You can now sign back into the Softphone using the new credentials on up to 4 devices.