Holiday Routing
Introduction
Holiday Routing allows you to set specific dates on which the office will follow a different set of rules, such as using a holiday IVR, or routing calls to an answering service.
The Holiday Routing page offers a more user-friendly interface for managing holiday conditions, while allowing flexible control over the holiday settings.
Offering both a 'Default Holiday Activity' and 'Per-date Holiday Acitivity' options, you can now easily configure different holiday activities for each date while retaining the option to dial a code and manually switch to holiday mode.

Access the Holiday Conditions Page
To access the Holiday Conditions page, click the holiday icon within the Call Flow Management section.
Here you can manage any Holiday Conditions that you have created or create a new one entirely.
- Name: You can name your holiday condition anything you like, but it is recommended to keep it simple and descriptive eg: "Brisbane Office Holidays".
- Activity Type / Activity: This represents the
Default Holiday Activityand is used whenever a more specific holiday activity is not configured for a specific date. - Status: Indicates the current state of the Holiday Condition (either Open or Closed).
- If the condition is Closed (Holiday), then calls will route as per the set holiday configuration instead of the "every day call flow".
- If the condition is Open (Normal), then calls will route to the normal "every day call flow".
- Toggle: The code listed here can be dialled from any handset with the '
Toggle Day/Night mode via handset' permission.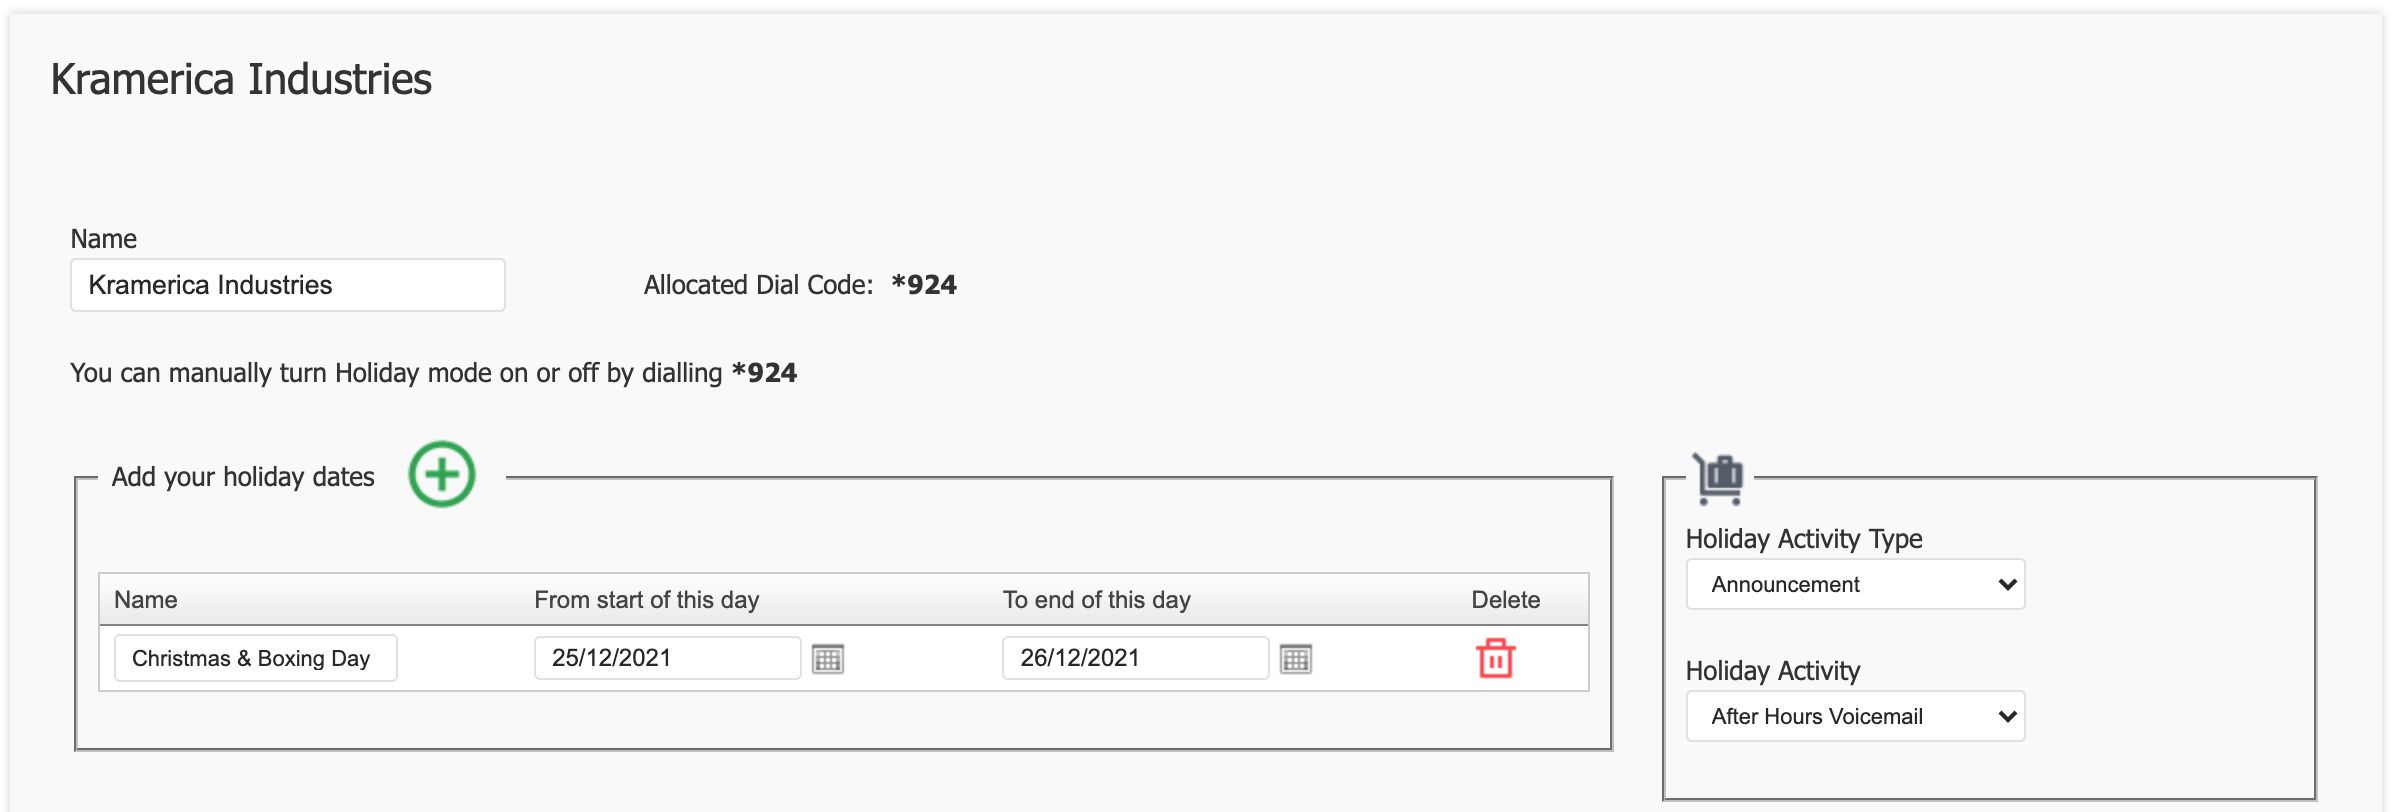
Configuring Holiday Conditions
Click either 'Manage' to edit existing, or 'Add Condition' to create a new Holiday Condition.
When creating a new Holiday Condition, the following steps are required at a minimum:
- Name: You can name your holiday condition anything you like, but it is recommended to keep it simple and descriptive eg: "Brisbane Office Holidays".
- Timezone: The timezone is used to by the system when toggling between open and closed. It is recommended to keep this consistent with the timezone of the office.
- Default Holiday Action: Used whenever a specific holiday activity is not configured for a specific date, or if manually toggled via the allocated Star Code on a date where a holiday activity has not been configured.

Adding Dates
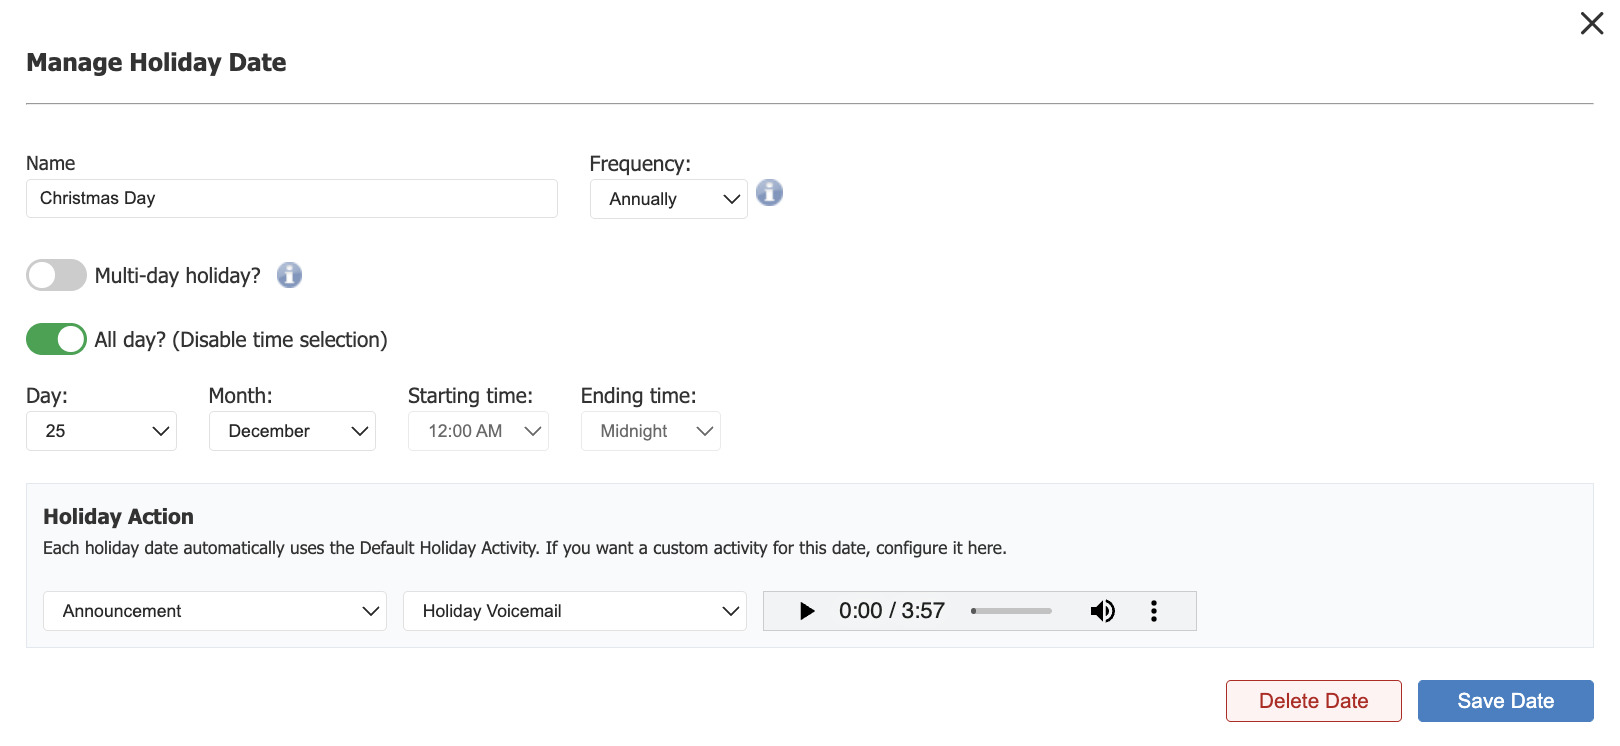
Each date, must have the following details:
- Name: For your reference. (eg: Christmas Day, or Long Weekend)
- Frequency: Choose from either
OnceorAnnualyrecurring.- Once: The holiday will occur only once on the selected date.
- Annually: When selected, you will need to set start and end days, as well as start and end times.
- Multi-Day Holiday: Enable this if the holiday spans more than one day.
- Holiday Action: This can be left as '
Use Default Holiday Action' for convenience, or you can select a specific Holiday Activity to be triggered.
Make sure to click 'Save Date' when finished adding your date.
Finally, once all changes are finished, you can click the 'Save' button at the bottom of the main page.
Tip
The holiday condition will not take effect unless allocated to a call route (and the changes have been applied).
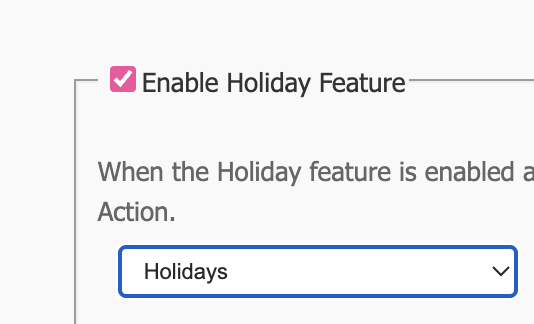
Enable Holiday Condition
For a Holiday Condition to function, it must be configured on one (or more) call routes.
Tip
You can apply the one Holiday Condition to many call routes.
Step 1. To access the Call Routing page, click the Call Routing icon within the Call Flow Management section of the PBX Configuration Screen.
Step 2. Locate the Call Route you want the Holiday Condition to apply to and click 'Manage' to edit the call route.
Step 3. Select the Holiday Condition you wish to apply to the call route.
Step 4. 'Save' the call route.
Step 5. Once saved, make sure to click 'Apply Changes' if prompted.
