Virtual Fax
Overview
The Virtual Fax feature allows you to send and receive faxes electronically, delivering them via email to a nominated address. It provides all the convenience of email without needing a traditional fax machine.
Configuration
There are three steps to configuring Virtual Fax:
- Enable Virtual Fax Plugin
- Configure Inbound Fax
- Configure Outbound Fax
Enable Virtual Fax
To configure Virtual Fax, you first need to enable the virtual Fax plugin for your PBX.
- From the PBX Configuration screen, click ‘Manage Applications’.
- Read and agree to the disclaimer shown.
- Click the checkbox to enable Virtual Fax.
- Click 'Save'.

Your changes are now ready to 'Apply' to your PBX. Click 'Apply Changes'.
Configure Inbound Fax
To enable inbound Virtual Fax:
-
Click on 'Call Routing' from the PBX Homepage.

-
Click 'view/edit' next to the number you wish to modify, or click 'Add Call Route'.
-
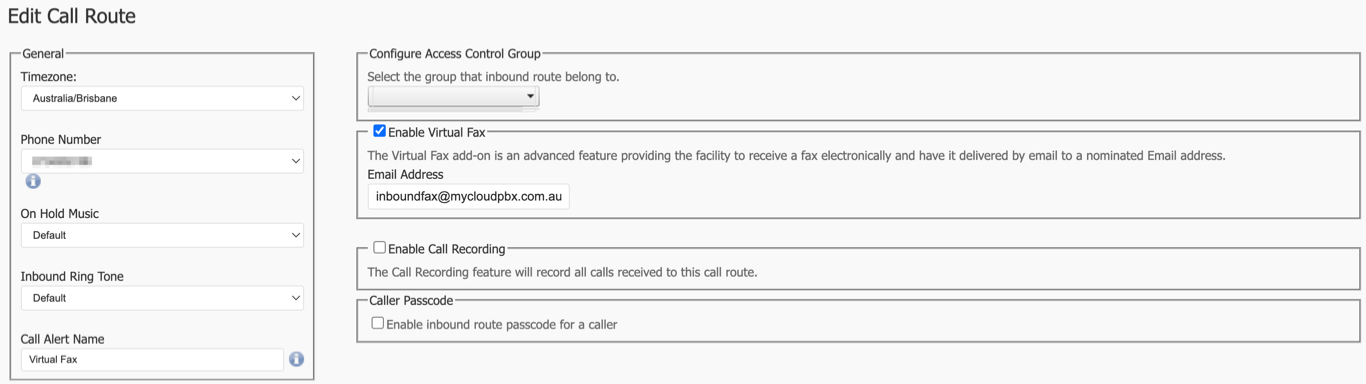
Fill in the following information:
- Timezone: This ensures correct timestamps.
- Phone Number: This is the inbound number you will be using.
- Call Alert Name: For your reference.
- Click 'Enable Virtual Fax'.
- Enter the email address that will receive the email containing the fax message.
- Click 'Save'.
Your changes are now ready to 'Apply' to your PBX. Click 'Apply Changes'.
Configure Outbound Fax
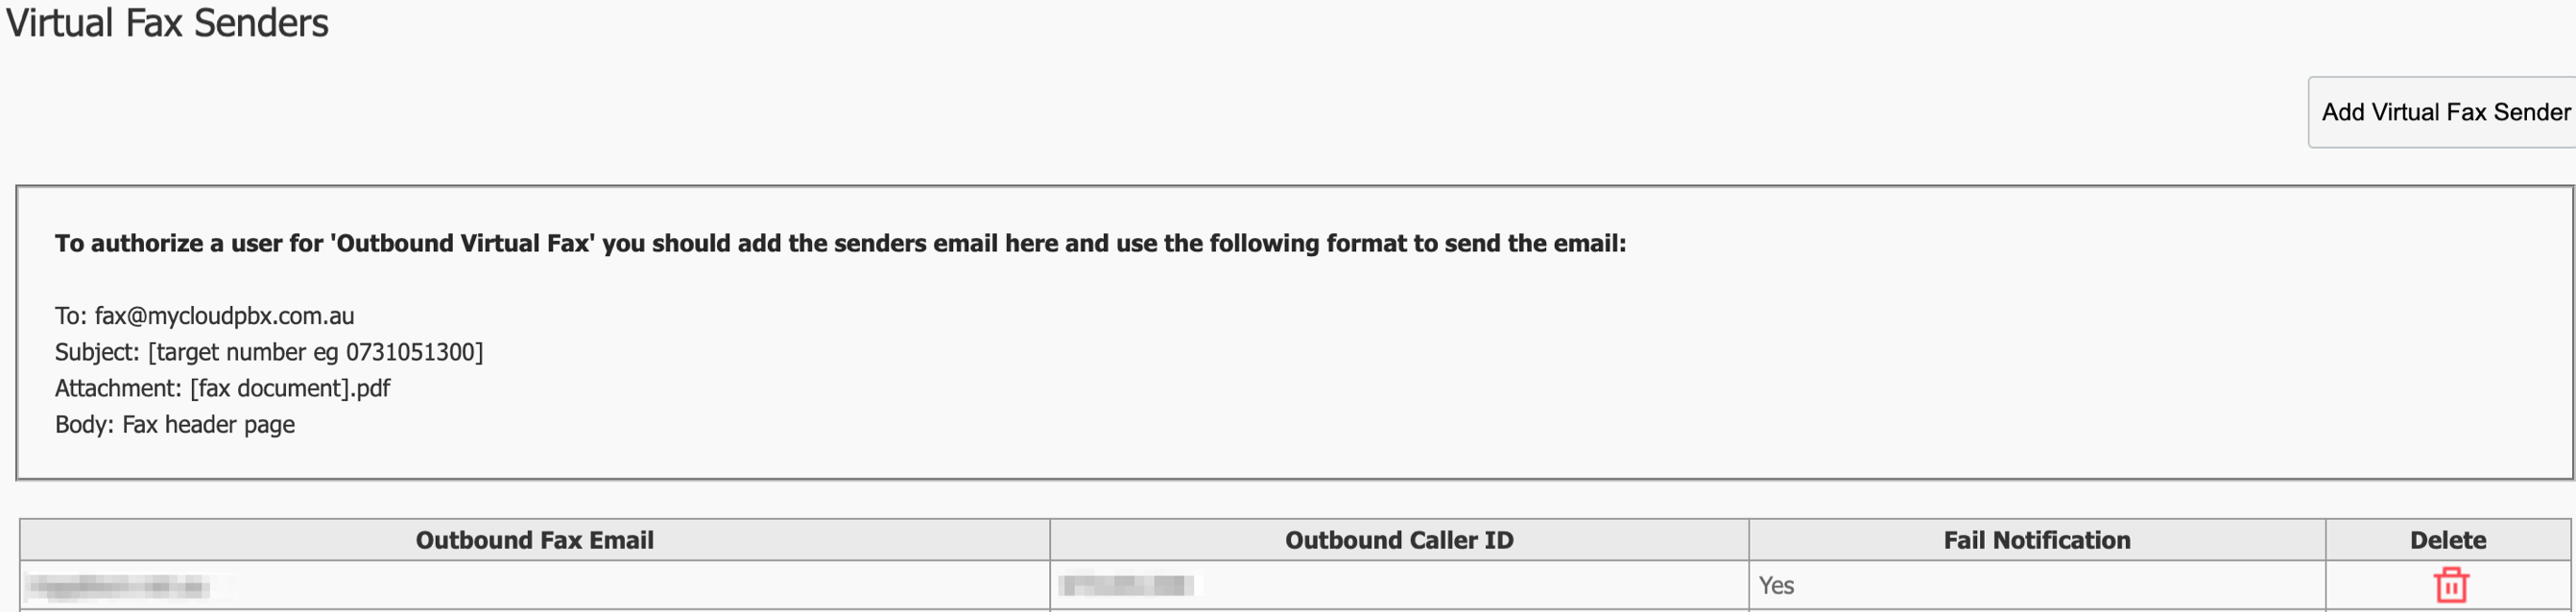
To send Virtual Fax, your email address must be added to the 'allowed senders' list.
- From the PBX homepage, select Virtual Fax
- On this page, click 'Add Sender' and enter the sender's email address and set the outbound caller ID.
- Click 'Save' when finished.
Usage
- Send Faxes: Attach the document to an email and send it to the designated fax address.
- Receive Faxes: Faxes will be delivered as email attachments to the configured email address.
Virtual Fax Troubleshooting
As the Virtual Fax feature operates over a Voice Over IP network, there may be circumstances where a fax fails. There is no ability for us to correct, recover, or improve the facility in such cases.
Anytime you send a fax, you will receive a receipt indicating if the fax was successful or not. If a failure occurs, the receipt will contain the reason for the failure as well as the message header of the sent fax. Possible failure notices include:
Sending Rejected - Invalid Number
The 'invalid number' receipt indicates that the email sent by the user did not contain a valid fax number.
Solution:
- Ensure the number is 10 digits long.
- Remove any spaces or special characters.
Sending Rejected - No PDF Attached
The 'no PDF attached' receipt indicates that the email sent by the user did not contain a valid PDF attachment, or that the PDF was not able to be detected.
Solution:
- Ensure the email contains a valid PDF attachment, make sure that the attachment is not attached INLINE (drag / drop) and does show as a standard attachment.
- If you are sending from a 'scan to email' system such as a multi-function printer, consider trying using Outlook as a test first.
- Naming the attached PDF is important. Please ensure the PDF meets the following naming requirements.
- The filename should not contain any spaces.
- The filename should not contain any special characters anywhere.
Once you have validated everything is correct, please try again.
Sending Rejected - Invalid User
The 'invalid user' receipt indicates that the sending email address has not been authorised to send faxes. Contact your administrator to arrange access.
Attempted Fax Receive for xxxxx from xxxxx Failed.
From: Fax Agent <no-reply@mycloudpbx.com.au>
Subject: Attempted Fax Receive for xxxxx from xxxxxx Failed.
Content: Failed to retrieve any fax data.
Common causes: This error occurs when a voice call (mobile or landline) is made to a fax number. Since the service is only listening for fax tones, it registers the call as a failed fax.
Solution: Return the call using a regular voice line and inform the user that they are attempting to call a fax line.
Transmission Failed
The 'fax transmission failed' receipt indicates that the outbound fax failed after myCloudPBX attempted to send it 5 times.
Common causes:
- The fax number is incorrect.
- The fax number is unreachable and does not answer the call from myCloudPBX.
- The receiving fax machine is attempting to use a high-speed transmission mode that is not compatible with myCloudPBX.
- The receiving fax machine is using Error Correction Mode (ECM).
Solution:
- Confirm with the intended recipient that the number is correct.
- Verify the number is a fax machine by calling it from a mobile phone.
- Have the receiving fax machine set its transmission speed for both send & receive to 9600bps.
- Have the receiving fax machine disable Error Correction Mode (ECM).
- Try again in 5 minutes.
More about Error Correction Mode (ECM):
When there is noise or poor call quality on the fax call, parts of the transmission may become corrupted or lost in transit. ECM looks at the data received and will request a re-transmission of the corrupted data until it receives an error-free copy. Disabling ECM can increase the chances of the receiving fax machine accepting the transmission even if some data is imperfect due to interference.
Best Practices
- Regularly update the list of authorised fax senders.
- Monitor the virtual fax service for any issues with fax delivery.