Call Recordings
Call recordings can be enabled for inbound calls (per call route), outbound calls (per extensions), or both.
Tip
Once enabled, calls will be recorded even if they are not answered.
Enable Call Recording Application
To turn on call recordings for a call route, you must first enable the call recording functionality on your PBX. From the PBX Configuration screen, click ‘Manage Applications’. ![]()

Scroll down until you see 'Call Recording'. Tick ‘Call Recording' on.
You will now need to go back to the PBX Configuration page to enable recordings for either inbound calls, outbound calls, or both as per your needs.
Inbound Calls
To enable call recordings for an inbound route, select 'Call Routing' from the PBX homepage.

Find the number for which you wish to enable call recordings and then click 'view/edit'.

Click the checkbox to 'Enable Call Recording' for all inbound calls.
Scroll down to the bottom of the page and click 'Save' to save your changes.
Your changes are now ready to be applied to the PBX.

Click ‘Apply Changes’.

Outbound Calls
To enable call recordings for outbound calls, select 'Offices & Users' from the PBX Configuration screen. ![]()

Select the extension you wish to modify.
Scroll down to ‘Security & Other Features’, then enable ‘Record calls from this extension’.
Click ‘Save’ when finished.
Your changes are now ready to be applied to the PBX.
Click ‘Apply Changes’.
Shortcut Codes
During an active call you can use the following shortcut codes.
Call Recordings must be enabled.
- If a recording is active #8 will stop the current recording.
- If a recording is not currently active #8 will start an adhoc recording.
- If a recording or adhoc recording is active #7 will enable masking of the recording.
- If a call is currently masked #7 will stop masking.
Accessing Call Recordings
There are two ways to access your call recordings.
- FTP
- myCloudPBX Dashboard
myCloudPBX Dashboard
- Login to the Portal
- Browse to Services > myCloudPBX Service (example: pbx_mycompany)
- Click the Dashboard button
- Select Call Recordings from the left hand menu
Download Call Recordings with FTP
Set your FTP password from within the Portal
- Login to the Portal
- Browse to Services > myCloudPBX Service (example: pbx_mycompany)
- Under Active Applications select Call Recordings
The screen provides the FTP server address and your unique username
Enter a secure password and click Save
Ensure you have a current version of the 'filezilla FTP client' from the following link: (https://filezilla-project.org/download.php)
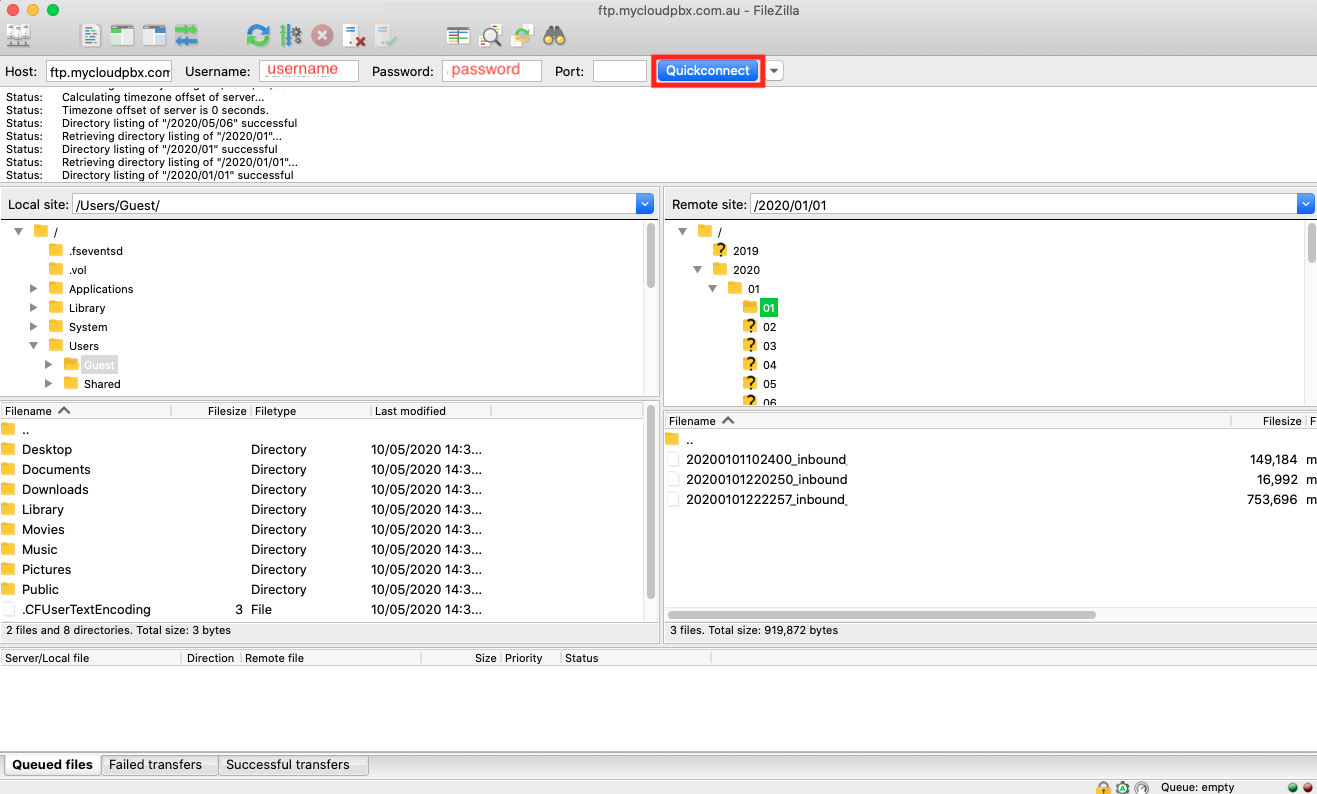
When prompted, enter the following information:
- HOST: ftp.mycloudpbx.com.au
- Username: The username listed in the portal.
- Password: The password configured in the portal.
Click 'QuickConnect'.
If you are prompted about the certificate:
- Tick 'Always trust certificate in future sessions'.
- Tick 'Trust this certificate on the listed alternative hostnames'.
Click 'OK'.
You will now see the recorded files listed on the right-hand side of FileZilla, and your local machine on the left-hand side of FileZilla.
Simply drag and drop the files you wish to copy from the right-hand side onto your local machine on the left-hand side.
Download Call Recordings with SFTP
SFTP (Secure File Transfer) access will be avilable in early-mid 2026, please check back for updates.
Call Recording Encryption
Generating a Public/Private key pair.
To enable call recording encryption you will first need to generate a Public/Private key pair. To create a Public/Private key pair, we recommend using OpenSSL.
Windows users
Download OpenSSL for Windows (https://wiki.openssl.org/index.php/Binaries)
To run the commands below, go to the OpenSSL32 directory on your PC, and change to the /bin directory.
Note: You may need to open the command prompt with admin privileges (run as administrator) and you will need to restart your computer before generating a certificate.
Mac users
OpenSSL comes shipped with Mac OS X version 10.6.2 onwards.
You can use Terminal to run OpenSSL (Open Applications > Utilities > Terminal or search for ‘terminal’ using the search bar in the top right-hand corner of your screen) and run the commands below.
Note: You may need to run each OpenSSL command line with elevated privileges. – add sudo before each command as needed.
Using OpenSSL
The basic command line steps to generate a private and public key using OpenSSL are as follows:
openssl req -newkey rsa:2048 -nodes -keyout myprivatekey.pem -x509 -days 1825 -out mypublickey.pem
Note
STORE YOUR PRIVATE KEY IN A SAFE, SECURE LOCATION. IF THE PRIVATE KEY IS LOST, ENCRYPTED FILES CANNOT BE DECRYPTED.
Enabling Call Recording Encryption
To turn on call recordings for a call route, you must first enable the call recording functionality on your PBX.
From the PBX Configuration screen, click ‘Manage Applications’.
Enable the call recording encryption and paste a copy of your PUBLIC KEY.
Tip
To learn how to generate a private key, click here
Click 'Save'.
Recorded calls will now have an “.enc” suffix to identify call recorded with a user-provided public key.
Decrypting Call Recordings
To decrypt call recordings, use the following command. (Adjust for your filename.)
openssl smime -decrypt -binary -in RECORDING_NAME.mp3.enc -inform DER -out RECORDING_NAME.mp3 -inkey myprivatekey.pem