Scheduled Reporting
Overview
Scheduled Reporting allows you to create a report and receive it in your inbox when you need it.
If a report is available for scheduling, you will see this button: 
Creating a report
Click the button to create your report.
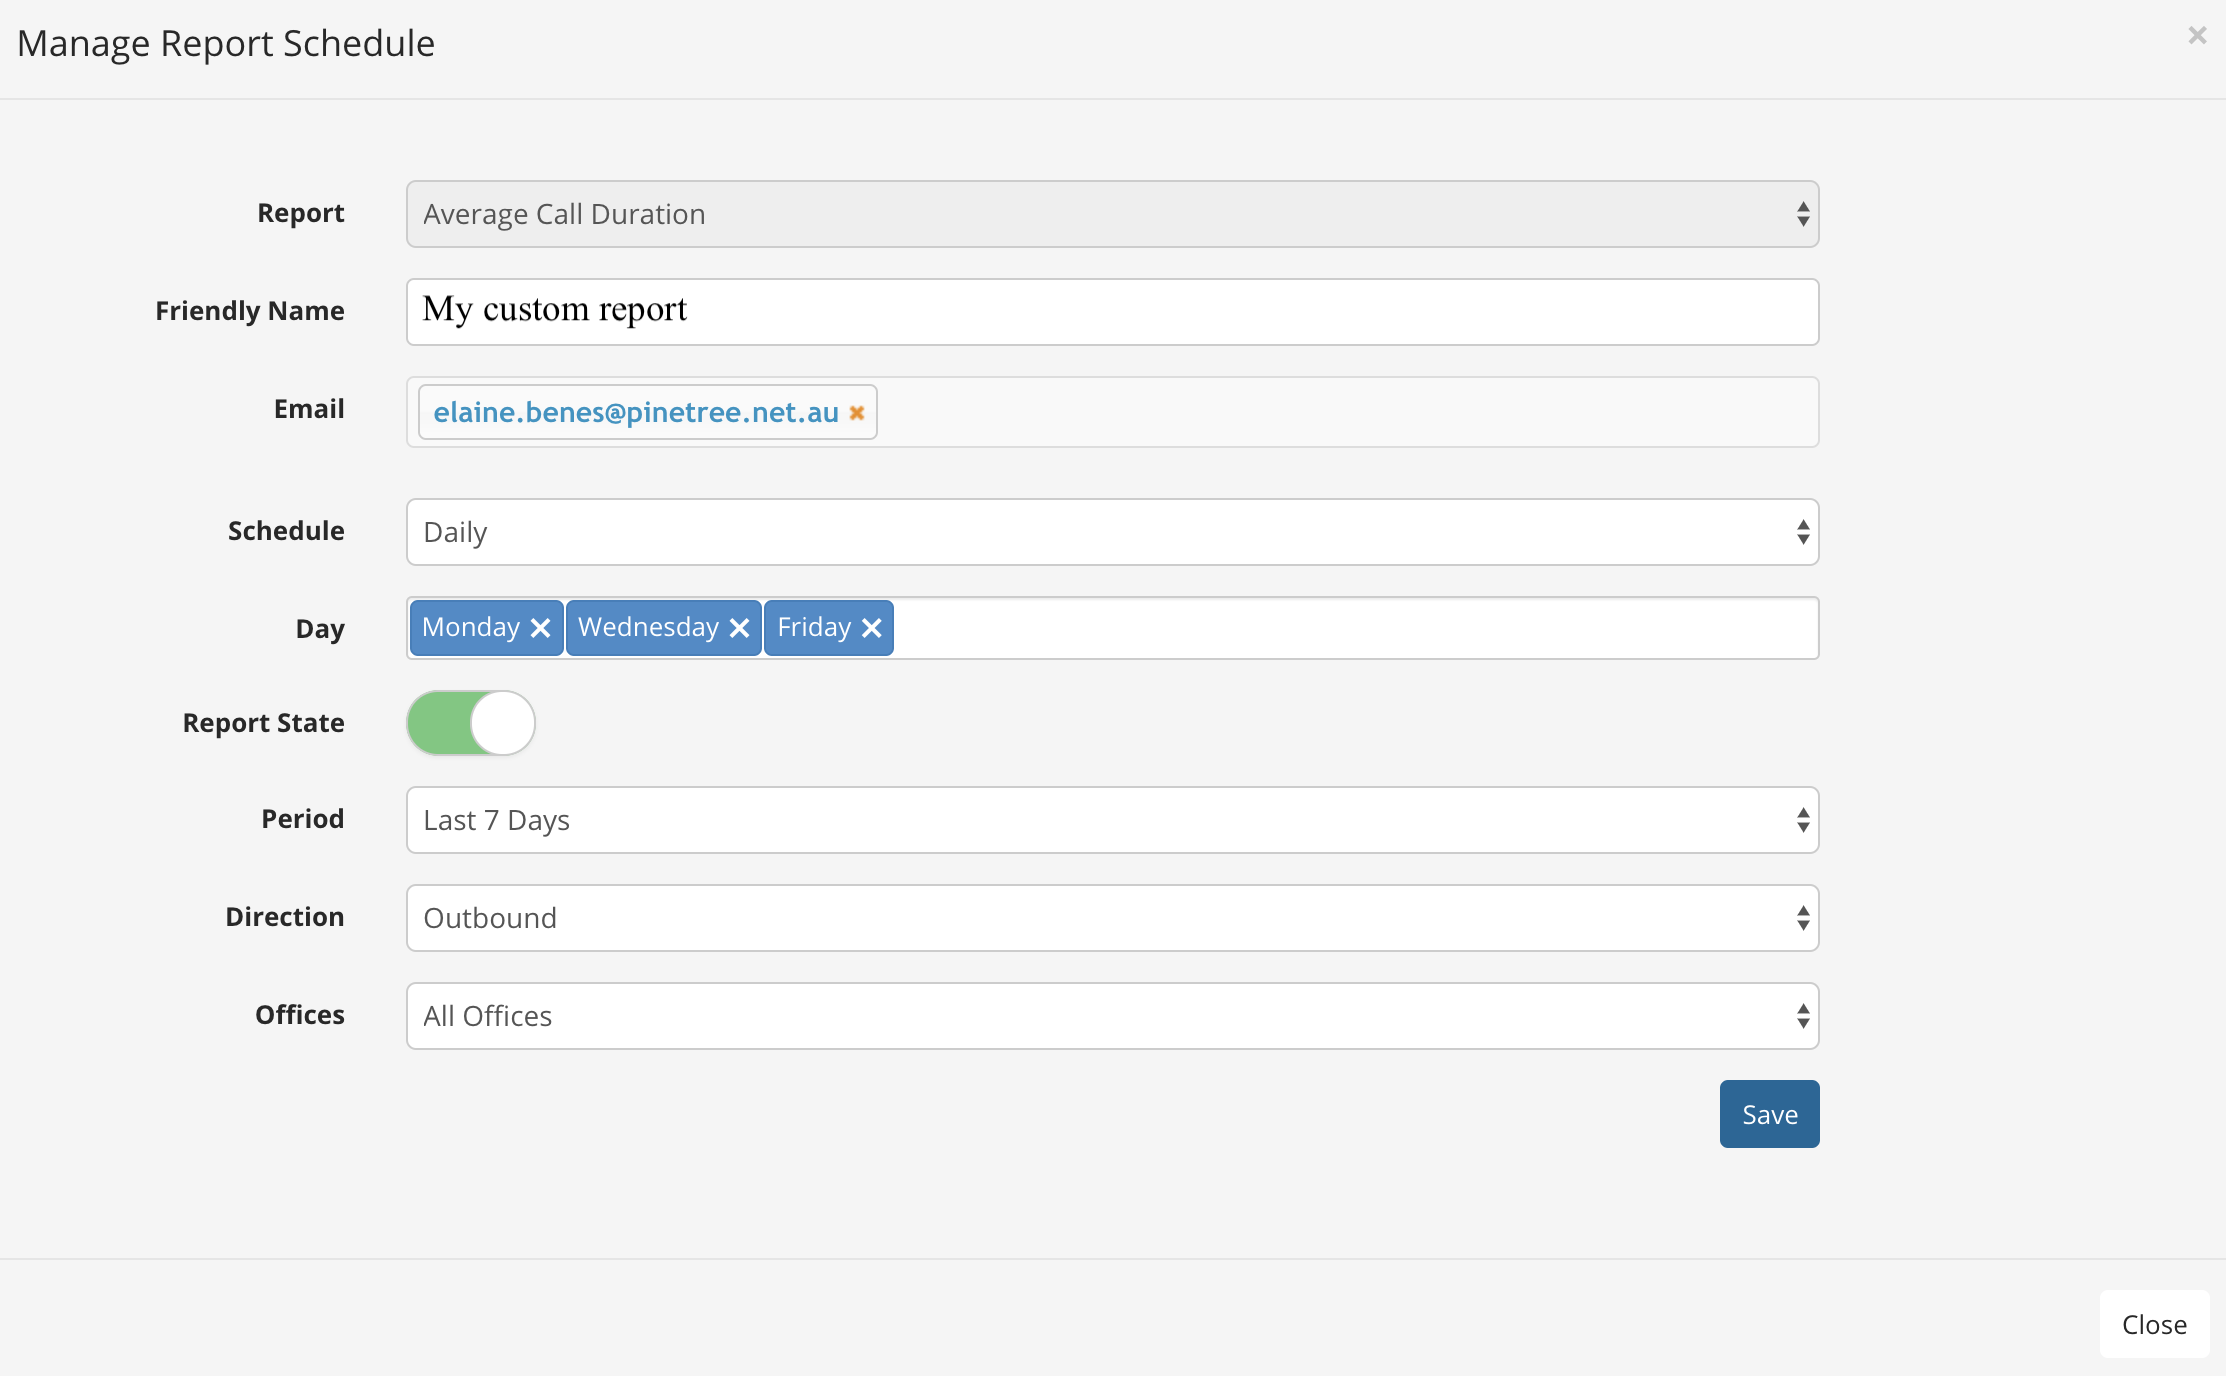
- Report: This is the report type.
- Friendly Name: This is your name for the report.
- Email: Add as many email recipients as required.
- Schedule: Choose from Daily, Weekly, or Monthly.
- Daily: Select the days you wish to receive the report.
- Weekly: Choose the day of the week you wish to receive the report.
- Monthly: Choose the day of the month you wish to receive the report.
- Runs at (Hour): The report will begin generating at this time and the email will be sent upon completion. This does not mean the report will arrive at this time.
- Report State: Use the toggle switch to choose from ON or OFF.
- Period: Choose from the last 7 days, 14 days, or the last month.
- Direction: Choose from Inbound, Outbound, Internal, or All Calls.
- Offices: Choose from a specific office, or all offices.
Tip
Use the Advanced Options to specify an even more detailed day / time to include within your report. Example: Monday - Friday, only including calls within 9am - 5pm in the report.
When you are finished, click the  button.
View / Modify Existing Reports
Click Scheduled Reports from the left hand menu.
Here you can see the reports scheduled for the PBX including the report type, schedule, operating status, and the date last run.

- To edit a report, click
 .
. - Use the toggle switches to enable or disable a report.
- To delete a report, click
 .
.